)
)
)
)
)
)
)
)
, which seemed okay since the weatherstripping still seals the door fully despite the slight twist, and the twist isn't really noticable to the eye anyway.")
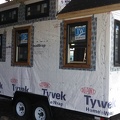
The installed door. Installing the door turned out to be fairly difficult, largely because my rough opening was *just* big enough to fit the door. At the bottom of the door the opening was so close that if the door were even 1/8 of an inch wider it wouldn't have fit. This left me very little room to adjust the door for plumb and level with shims. Fortunately, the rough opening was nearly level and plumb to begin with. On the unfortunate side, the right side of the rough opening is not completely plumb forward to back, meaning that I could either slightly twist the doorframe a bit to fit in cleanly, or else set the door perfectly plumb and then have to deal with a gap or too much door in front of or behind the door, respectively, which would cause some problems when putting on siding and paneling inside and out. I opted to let the door be slightly twisted (about 1/4"), which seemed okay since the weatherstripping still seals the door fully despite the slight twist, and the twist isn't really noticable to the eye anyway.
- Created on
- Tuesday 18 March 2014
- Posted on
- Wednesday 19 March 2014
- Dimensions
- 1836*3264
- Filesize
- 1622 KB
- Tags
- tinyhouse
- Albums